Minimal Prerequisite for Security Server
| Parameter | Value |
|---|---|
| CPU | 2 |
| Memory | 4 GB |
| Storage | 50 GB |
| OS | Ubuntu 22.04/24.04, RHEL 8/9 |
| OS Architecture | x86-64 |
| Deployable Environment | Physical/Virtualized/Containerized |
Network Requirements
The Network diagram of Central server and Security servers are provided here

Configure Firewall
It is strongly recommended to protect the Security Server from unwanted access using a firewall (hardware or software based). The firewall can be applied to both incoming and outgoing connections depending on the security requirements of the environment where the Security Server is deployed.
Special attention should be paid with the firewall configuration since incorrect configuration may leave the Security Server vulnerable to exploits and attacks. This type of abuse could result in compromised access to the Security Server and the data that is exchanged through it.
It is recommended to allow incoming traffic to specific ports only from explicitly defined sources using IP filtering. Access for ports 8080, 8443 and 4000 should be especially defined, as these ports are used for making NRDEX queries and accessing the user interface.
OS Preparation (Security Server Node)
Add Non-Root User
sudo adduser {your_user}
You cannot use xroad as
sudo usermod -aG {your_user}
Install Pre-requisite Packages
sudo apt update && sudo apt install locales lsb-release
Locale Settings
Edit the environment file:
sudo vi /etc/environment
Add the following line:
LC_ALL=en_US.UTF-8
Apply the installed locales settings:
sudo apt update && sudo apt install -y locales
sudo locale-gen en_US.UTF-8
Time Configuration
Set the timezone:
timedatectl set-timezone Asia/Dhaka
Edit the NTP configuration:
vi /etc/systemd/timesyncd.conf
Add NTP configurations:
it must be done according to Security Server hosting partner instructions.
If the server is hosted in BCC, then add following lines.
NTP=43.229.13.100
FallbackNTP=114.130.54.105
Restart the time sync service and verify:
systemctl restart systemd-timesyncd
timedatectl show
Security Server Installation
Important: Take a snapshot of the node before proceeding.
Package Repository Setup
curl -fsSLk http://repo.nrdex.gov.bd/aptly.gpg | \
gpg --dearmor | \
sudo tee /usr/share/keyrings/xroad-keyring.gpg > /dev/null
echo "deb [signed-by=/usr/share/keyrings/xroad-keyring.gpg] \
http://repo.nrdex.gov.bd/ noble-current main" | \
sudo tee /etc/apt/sources.list.d/xroad.list > /dev/null
sudo apt update
Install Security Server
sudo apt update && sudo apt install xroad-securityserver
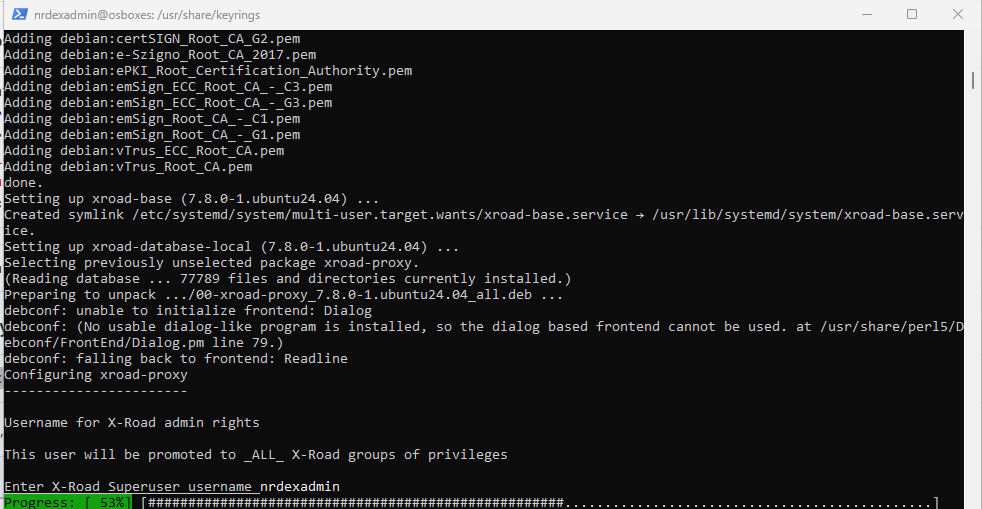
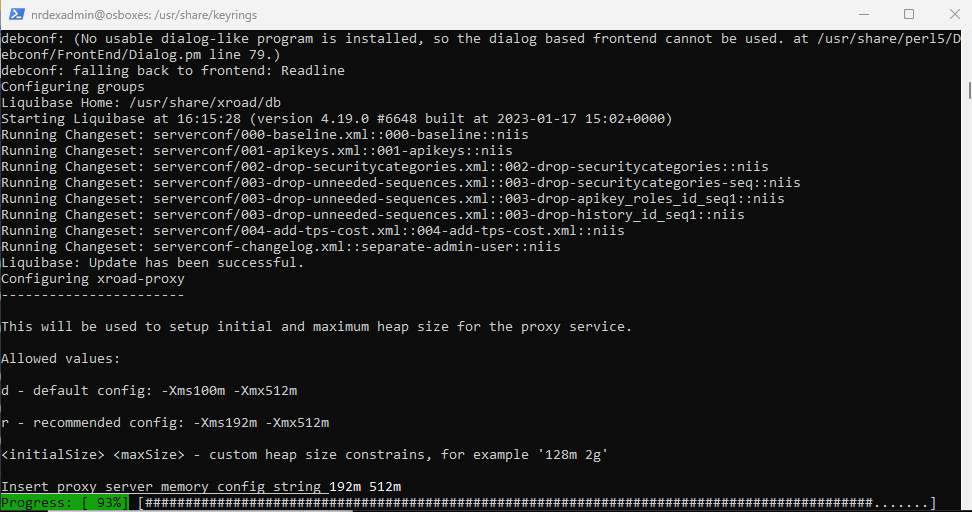
During installation, provide the following values:
| Prompt | Value |
|---|---|
| Superuser NRDEX | {your_user} |
| DB URL | 127.0.0.1:5432 |
| Database migrations | false |
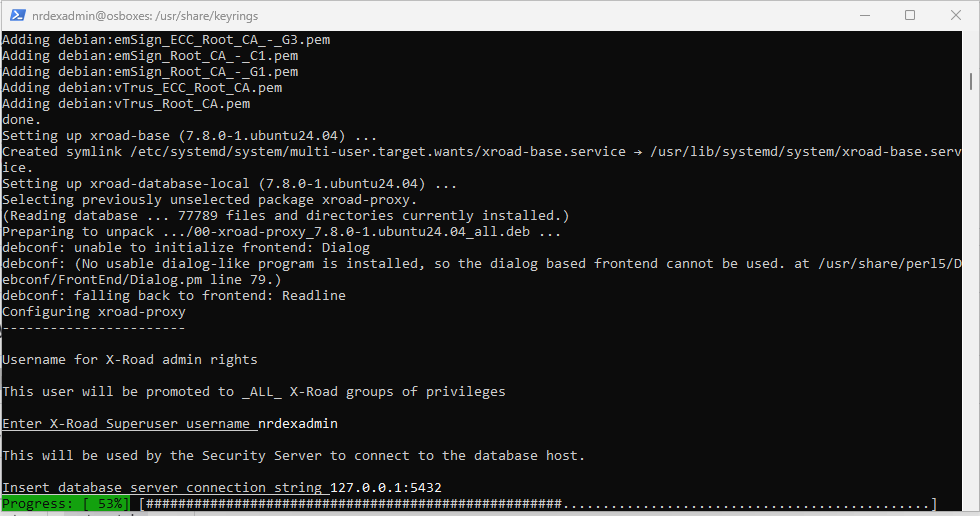
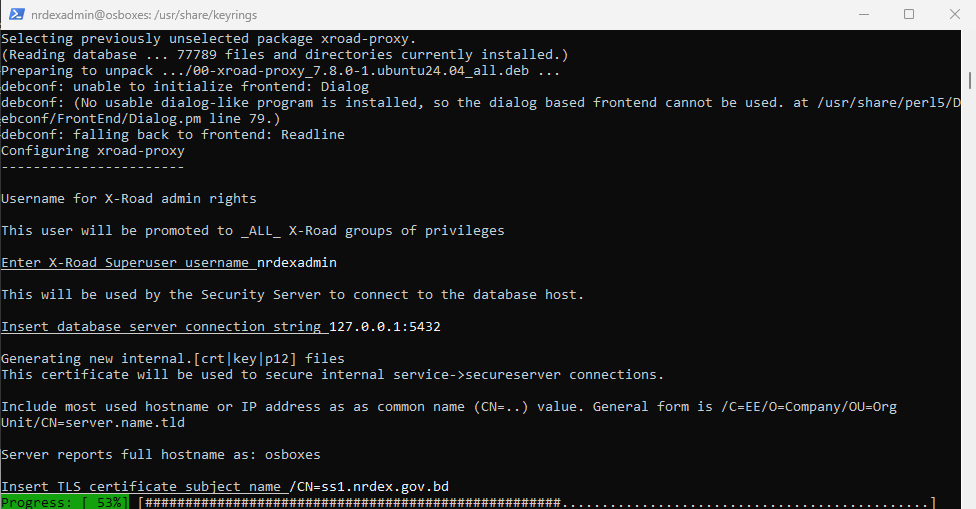
TLS Certificate (subjectDN / subjectAltName):
/CN={your-hostname}.gov.bd
IP:10.106.14.124,DNS:{your-hostname}.gov.bd,DNS:{your-hostname}
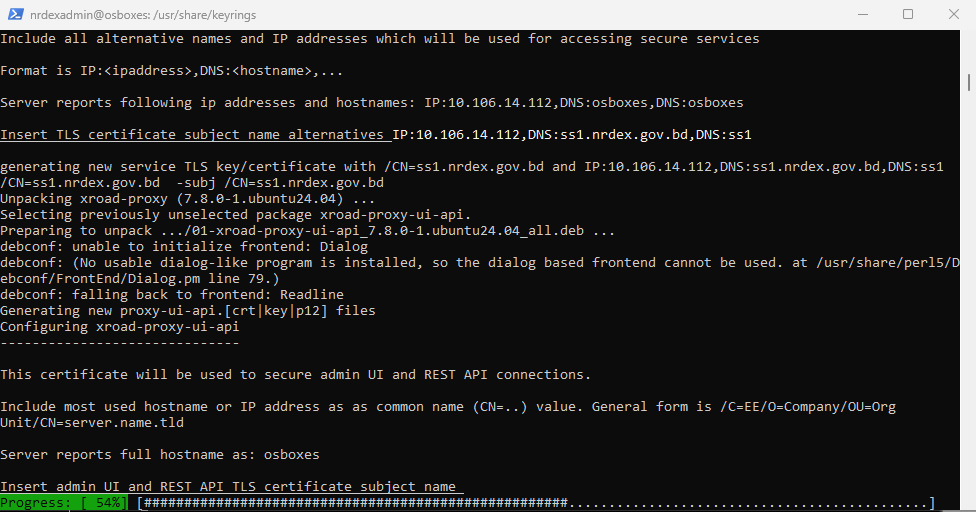
Admin Interface TLS certificate subject name:
/CN={your-hostname}.gov.bd
IP:10.106.14.124,DNS:{your-hostname}.gov.bd,DNS:{your-hostname}
Initialize the NRDEX Security Server
Log In to the Web Console
Navigate to: https://{your-hostname}.gov.bd:4000
Log in with {your_username} credentials.
Configure with Global Configuration Anchor
Upload the global configuration anchor obtained from the repository
server via the web console.

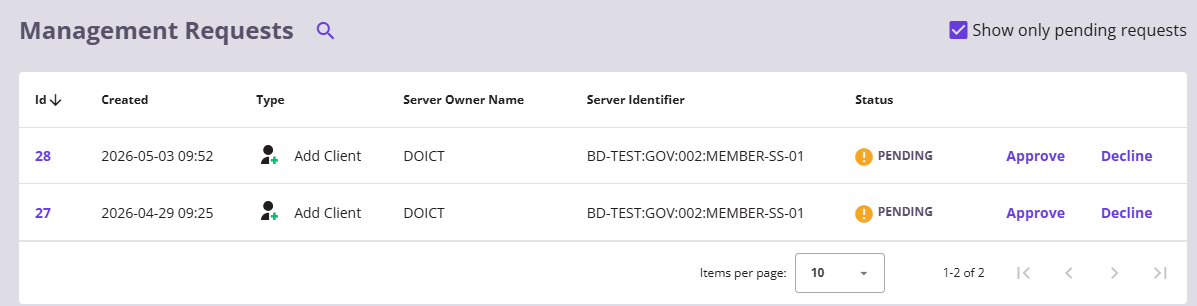
You need to send a request for approving to the central server. Then this will be approved by central server.
Create Authentication and Signing Certificates
Create Signing Certificate
A python script will be found in beta.nrdex.gov.bd website. Download it
and save it.
You can also download it using wget
wget https://beta.nrdex.gov.bd/assets/downloads/signer-console-csr-generation-script.py
run chmod 755 signer-console-csr-generation-script.py
change the user to xroad
sudo su xroad
Create CSR of SIGN
then run following command
python3 signer-console-csr-generation-script.py --usage s
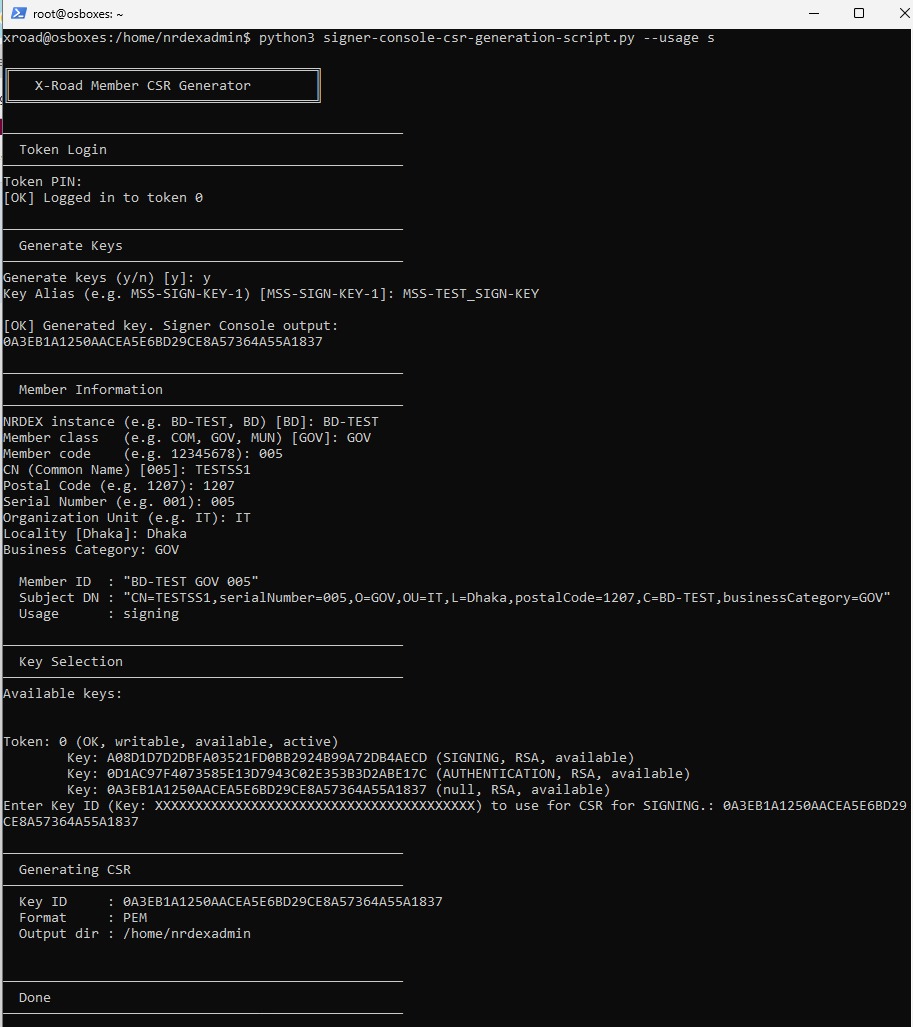
you will get a csr.
CSR saved to: {your_directory}/your-signing-key.csr
Next steps:
Send CSR-s to CA
Send 'your-signing-key.csr' to your CA for signing. you can do it using bcc-ca portal.
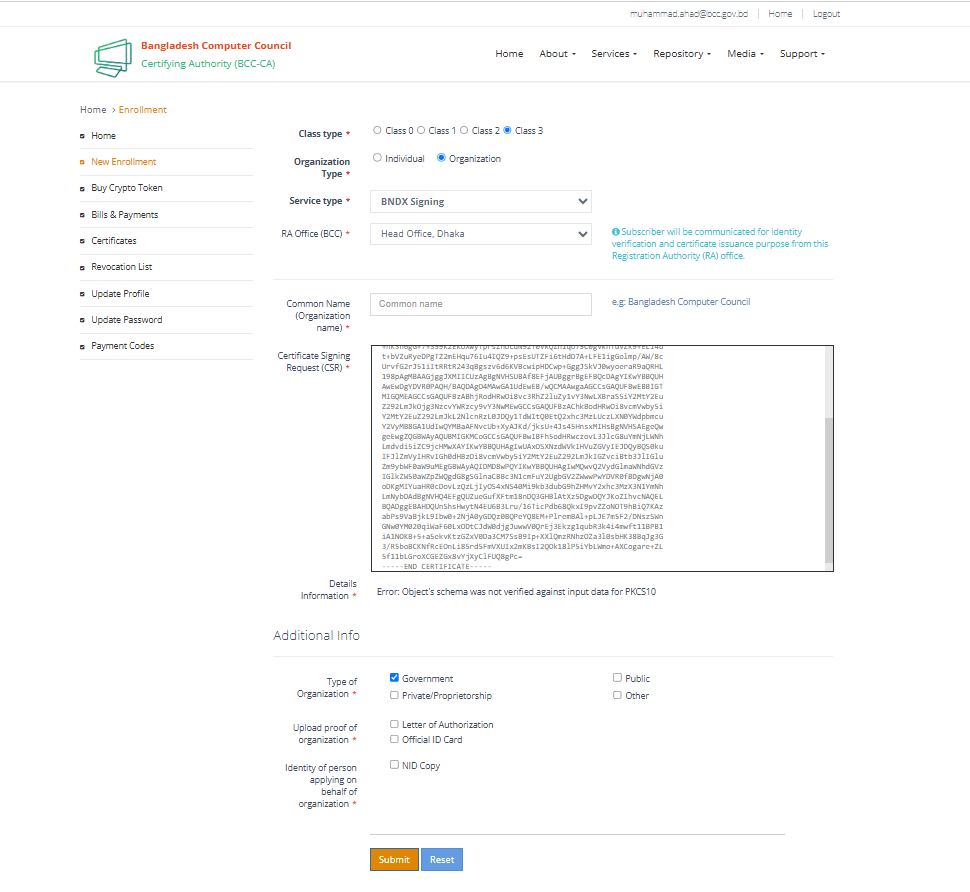
Please see certificate generation tutorial for more details on how to generate a certificate in BCC CA portal.
Import certificates (via GUI, API or signer-console)
Once you receive the signed cert, import it:
signer-console import-cert
you can also import certificate using browser.
Registering the Security Server at Operator
Signing certificates will be automatically registered once
imported.
Create Authentication Certificate
For authentication certificate, you need to run the followinfg command
python3 signer-console-csr-generation-script.py --usage a
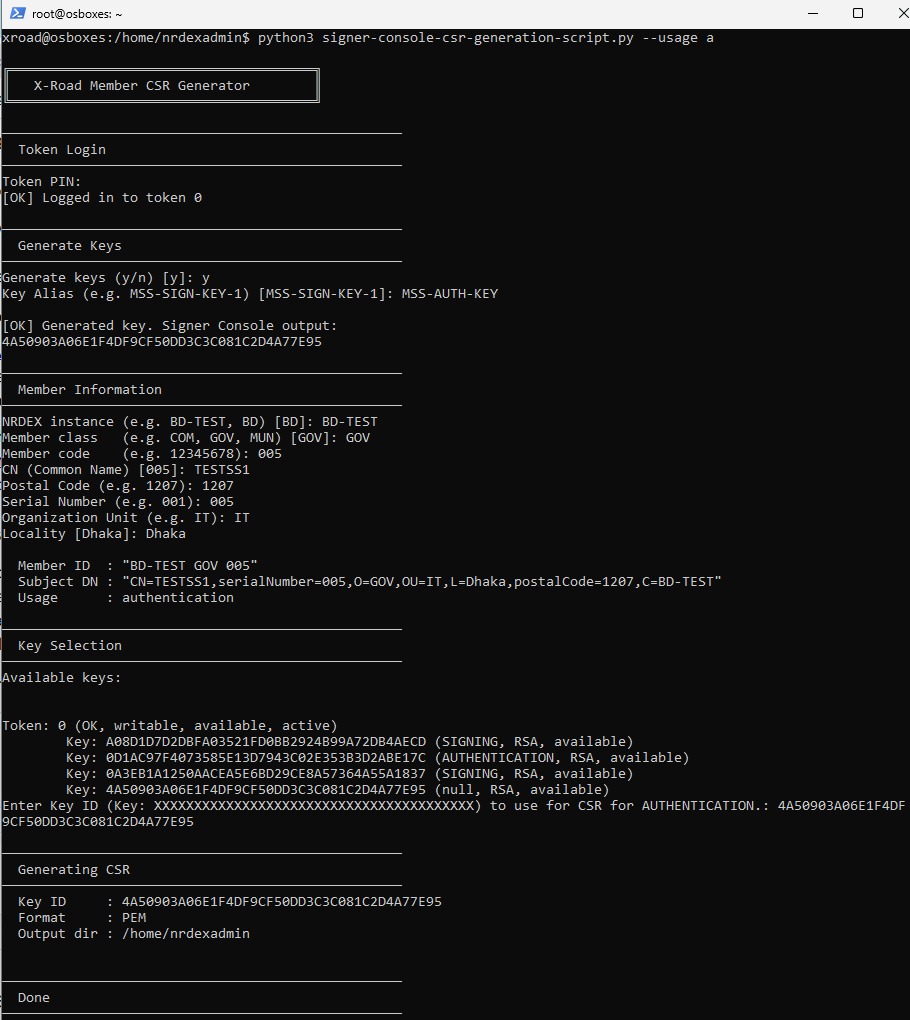
you will get a csr.
CSR saved to: {your-directory}/your-auth-key.csr
Next steps:
Create CSR of AUTH
Send 'your-auth-key.csr' to your CA for signing. you can do it using bcc-ca portal.
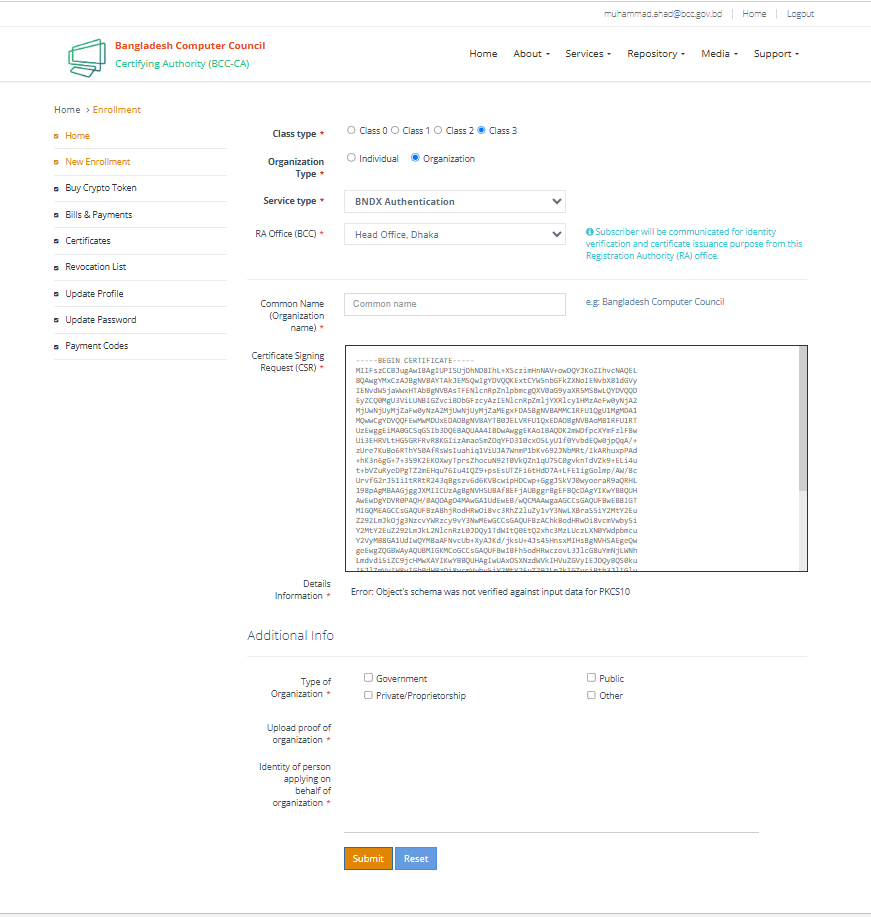
Import certificates (via GUI, API or signer-console)
Once you receive the signed cert, import it:
signer-console import-cert
Registering an AUTH
Register the authentication certificate by providing the management
security server address when prompted.
You can also import certificates from browser.
You need to go to https://domain-name:4000
The screenshots of web ui is attached here.
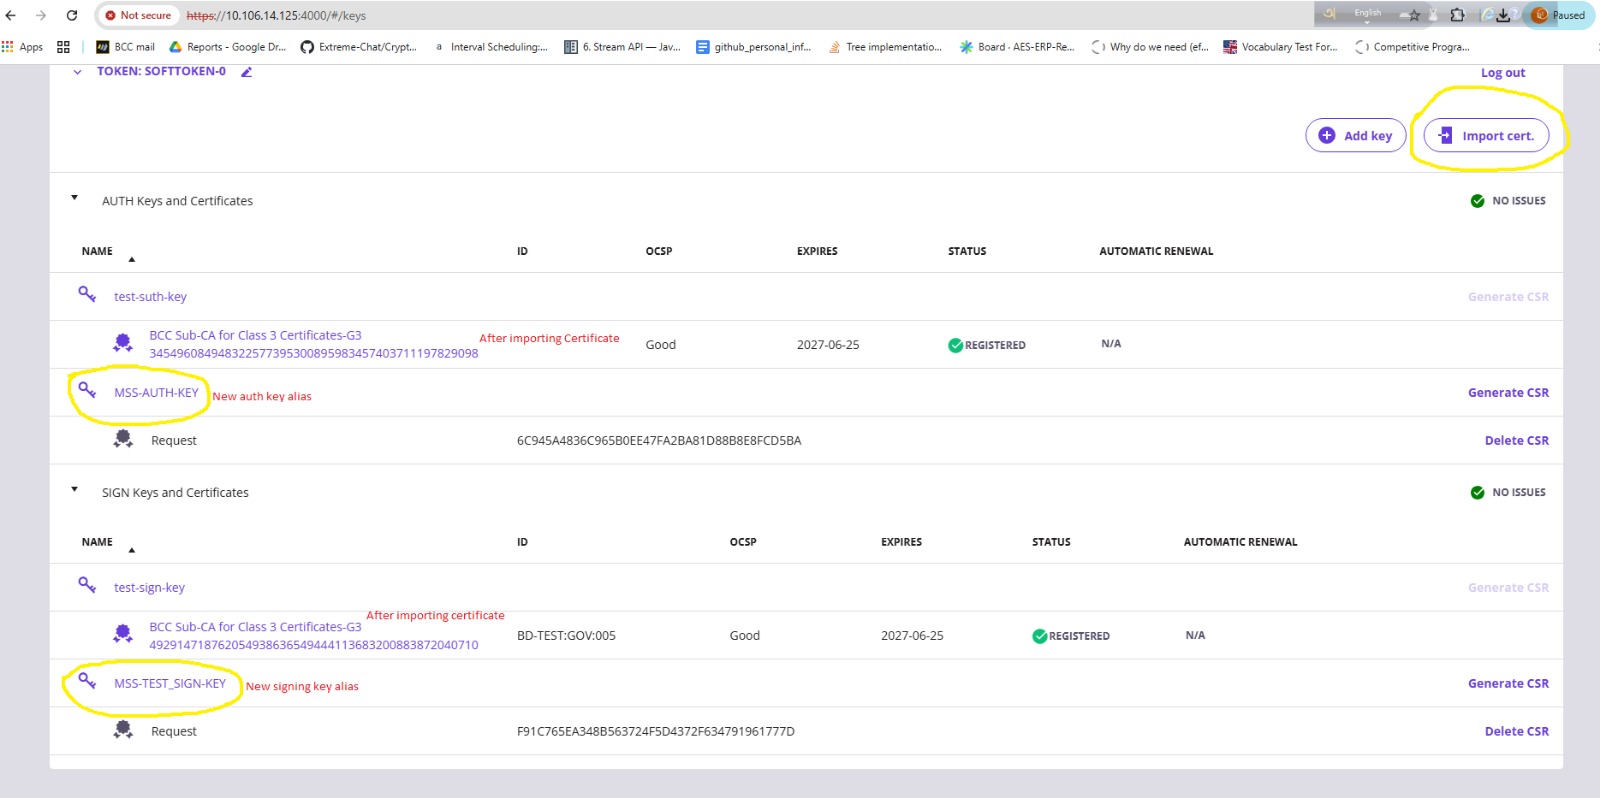
** You may need to use sudo before the commands **
Post-Installation Checks
The installation is successful if the system services are started and the user interface is responding.
-
Ensure from the command line that NRDEX services are in the
runningstate. Example output:sudo systemctl list-units "xroad-*"UNIT LOAD ACTIVE SUB DESCRIPTION xroad-addon-messagelog.service loaded active running X-Road Messagelog Archiver xroad-base.service loaded active exited X-Road initialization xroad-confclient.service loaded active running X-Road confclient xroad-monitor.service loaded active running X-Road Monitor xroad-proxy-ui-api.service loaded active running X-Road Proxy UI REST API xroad-proxy.service loaded active running X-Road Proxy xroad-signer.service loaded active running X-Road signer -
Ensure that the Security Server user interface at https://SECURITYSERVER:4000/ (reference data: 1.8; 1.6) can be opened in a web browser.
-
To log in, use the account name chosen during the installation (reference data: 1.3).
-
While the user interface is still starting up, the web browser may display a
connection refusederror.